Sunday, November 24, 2013

Roasted Acorn Squash with Chicken Sausage Stuffing

I really can't get over this recipe.


When I first found it on Skinny Taste, I was skeptical. There is not a lot of seasoning, and I had no idea what an acorn squash tasted like.

I'm SO glad I gave this a shot. It was warm, delicious, and perfect for the winter. AND low in calories, which fits right into my current diet plan, which you can read about by clicking HERE (Mimi - that means you click on the word HERE). Anything that says "LOCK IT UP" are my thoughts on my current diet and exercise plan.

Did I mention my diet and exercise plan included a greasy hamburger on Friday? No? Whatever. It was worth it. I've had a trying week.

Anyway, this squash thing - make it. It's so good, and I LOVE the presentation - how cute are my little squash in a bowl filled with stuffing?!

Here's what you need (slightly adapted from Skinny Taste) . . .

2 acorn squash*
3 links of sweet italian chicken sausage
1 cup of brown rice
1 1/2 cups of vegetable or chicken broth (low sodium)
Olive oil
1 tbsp unsalted butter
Salt
Pepper
1 medium yellow onion, chopped
5 garlic cloves, diced
3 stalks of celery, chopped
1-2 tbsp fresh sage, chopped

*This squash is tough to cut. You want to chop off the stem and then a little bit of the bottom so it will sit flat when you roast it. Then, cut it in half and scoop out the seeds. You'll want to lay it on it's side and cut it in half that way - equatorially as opposed to longitudinally.

Here's what you do . . .

1. Preheat oven to 350 degrees.

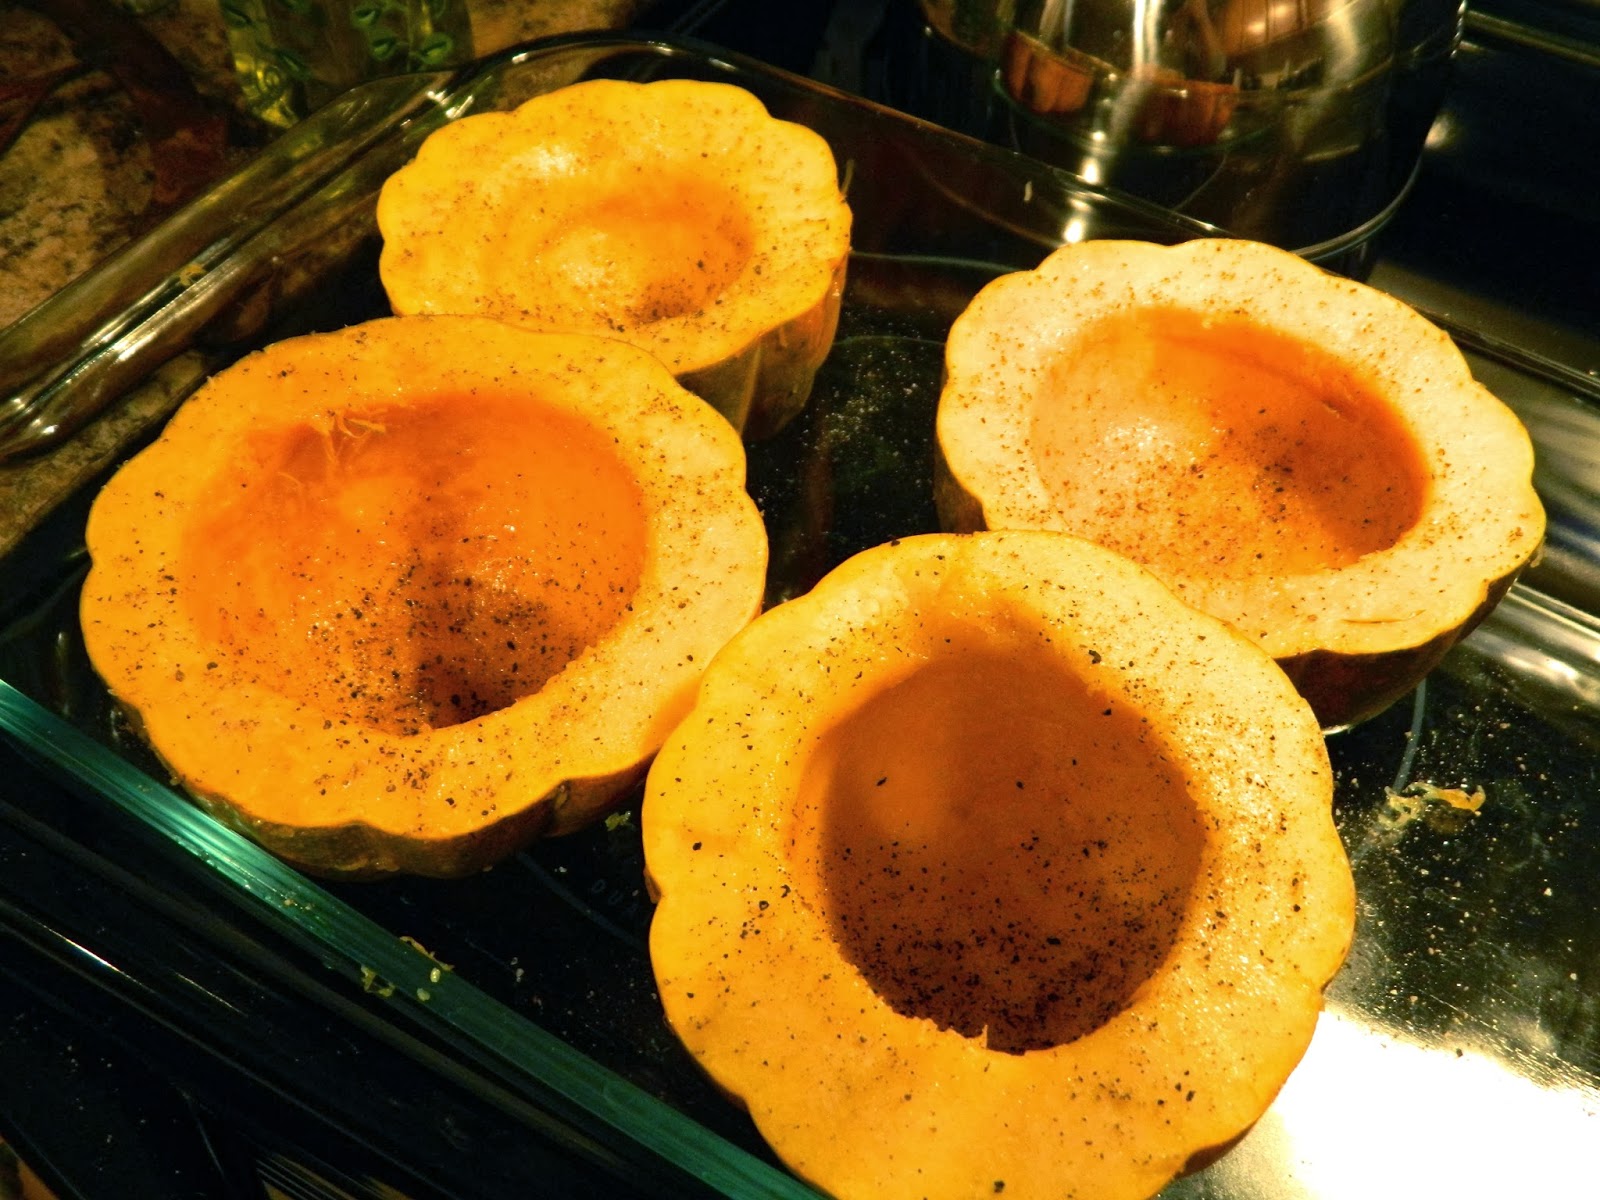
2. Cover your cut squash with some olive oil, and season evenly with salt and pepper. Put in a roasting pan with 1/4 cup of water on the bottom. Cover with foil and roast for 50 minutes covered, then 10 minutes uncovered.


3. Cook your rice according to the package. The brown rice we get says 1 1/2 cups of liquid to every 1 cup of rice. I cooked the rice with vegetable stock for extra flavor.


4. In a large pan, drizzle a little oil and cook the chicken sausage until slightly browned. Chop it up into little pieces as it cooks. When it is done, set it aside.

5. Add more oil to your pan and 1 tbsp of butter. Cook onion, garlic and celery until celery is soft, about 5-6 minutes. Add 1/2 tsp salt, 1/2 tsp pepper, and your fresh sage. Cook a few minutes longer.

6. Add your rice and stir to combine.

7. Put rice/chicken mixture into roasted acorn squash. Enjoy!


This was SO good and surprisingly filling. Half a squash with stuffing completely filled me up! AND, according to Skinny Taste, you're looking at only 250-300 calories per half squash. WHAT?! Who needs hamburgers?!

Me. I need hamburgers. Always. This is good, but it is no greasy hamburger substitute.

Have a fantastic week and a wonderful Thanksgiving!!  

Friday, November 15, 2013

Sweet Potato Casserole

'TIS THE SEASON!!!!! Is it weird that I picked the marshmallows off the top of this? No? Fantastic.


I apologize that I have not been posting all that often. Law school gets in the way of my extracurricular interests, but fortunately that will be a non-issue come May. Technically come August AFTER the bar exam, but whatever.

In addition to posting here, I'll also be jumping back on Beth's Blog to detail my NEWEST exercise journey. I've put on a couple pounds in the last few months - not enough to be noticeable, but I'm aware of it. Beth is helping me all the way from PORTLAND, OREGON because she is awesome. I'm tracking my progress on her blog. There are some amazing tips, so tune in!

Okay, onto this casserole. This is a WAY lighter version of sweet potato casserole. I made this last year for Thanksgiving, and I plan to make it again this year. This is SO good, and, if you use GF flour and oats, it is gluten free!

Full disclosure: I posted this last year, but…I didn't have pictures so it doesn't count.


Here's what you need (from How Sweet Eats) . . .

2 lbs sweet potatoes (2 big potatoes)
2 tbsp brown sugar
2 tbsp maple syrup
1/3 cup light coconut milk
2 tsp vanilla extract
1/2 tsp cinnamon
1/4 tsp nutmeg
1/4 tsp salt
2 tbsp unsalted brown butter*

For the topping:

1/2 cup unsalted pecans, chopped
1.5 tbsp brown sugar
1/4 cup unsweetened coconut flakes
1 tbsp flour
1/4 tbsp oats
1/2 tsp cinnamon
a little salt
a little nutmeg
2 tbsp softened unsalted butter
mini marshmallows

Mix all parts of topping together (except marshmallows) and set aside until ready.

*To brown butter: melt in a saucepan and stir consistently for 5 minutes on high heat, or until little brown flakes appear on the bottom. Remove immediately from heat, and set aside until needed

Here's what you do . . .

1. Preheat oven to 375.

2. Peel your potatoes, chop them into pieces and boil for 20-25 minutes, or until easily pierced with a fork. Remove from heat.

3. Transfer potatoes into a baking dish. I used a potato masher, but you can also use a handheld mixer, and beat/mix them well. Add all the ingredients (aside from topping) - brown sugar, maple syrup, coconut milk, vanilla, cinnamon, nutmeg, salt, and brown butter. Mix well.

4. Evenly top potatoes with topping. Then, add marshmallows on top of the topping!

5. Bake for 25 minutes. Remove from oven and enjoy!


I LOVE this recipe. If you are missing some sweet potato magic from you Thanksgiving line up, I HIGHLY recommend this.

I wish I could promise I would post every day, but with finals fast approaching, this is unlikely. I will do my absolute BEST!

Have a wonderful weekend!


Saturday, November 2, 2013

Slow Cooker Thai Chicken Soup

Hello, winter comfort food.


Is it really November?! I realized this morning that 6 weeks from today we will be on a plane en route to JAMAICA for our delayed honeymoon. I. can't. wait.

In the meantime, it continues to get colder in North Carolina, and I find myself second guessing this decision to move farther NORTH next year. 

This soup is SO delicious and really easy. You dump everything into a crockpot and you're good to go. 

My only complaint: it was not spicy at all. I think next time I will add more of the red curry paste or maybe a few chilis.

Here's what you need (from Foodie Crush) . . .

1.5 lbs of chicken breast cut into cubes
2 12 oz. cans coconut milk (I used light)
2 cups low sodium chicken stock or broth
2 tbsp fish sauce
2 tbsp brown sugar
2 tbsp peanut butter (I used reduced fat)
2 tbsp red curry paste
1 tbsp lime juice
1 red bell pepper, sliced into strips
1 yellow onion, sliced
1 cup of frozen peas, thawed
1 tbsp fresh ginger, minced (I used my cheese grater)
1 cup of cooked brown rice

Here's what you do . . .

1. Dump everything EXCEPT peas and rice into your slow cooker. Cook on low for 6 hours.


2. 30 minutes before you are ready to eat, cook your rice and dump your peas into the slow cooker. 

3. Serve over rice in a bowl. Enjoy!


Like I said, crazy simple and perfect for a cold Fall night. 

Have a great weekend!!

Monday, October 21, 2013

Pumpkin Bread

I am seriously kicking myself for not thinking to do this sooner.


Tis the season for me to make endless recipes with pumpkin and butternut squash. I'm not kidding, there are two giant butternut squash sitting on my counter. I saw them at the Farmer's Market this week and HAD to buy them even though I have no idea what I will do with them. Roast them?

Anyway, it is getting cold in NC, which means I can make pumpkin recipes until my heart is content.

Here's what you need (adapted from several different recipes, but mostly my own!) . . .

1/2 cup of coconut oil, melted
1 1/3 cup brown sugar
2 eggs
1 cup pumpkin puree (make sure it's unsweetened)
1/3 cup of water
2 cups of flour (I used gluten free Cup4Cup)
1/4 tsp baking powder
1 tsp baking soda
3/4 tsp salt
1/2 tsp nutmeg
1/2 tsp vanilla extract

For the streusel topping:

1/2 cup brown sugar
1/2 cup flour
1/4 tsp cinnamon
pinch of salt
1/4 cup softened butter (unsalted)
1 tbsp milk

Here's what you do . . .

1. Preheat oven to 350.

2. In a large bowl, mix oil, sugar, eggs, pumpkin and water.

3. Add flour, baking powder, baking soda, salt, nutmeg, and vanilla. Mix well.


4. Pour into a loaf pan and sprinkle brown sugar topping on the top. Bake for 60-80 minutes (mine took the full 80) or until a toothpick comes out clean when inserted into the middle.

5. Enjoy!

This is the PERFECT Fall recipe. It has just the right amount of spices, and because it has pumpkin in it, I have convinced myself it's basically equivalent to a vegetable. 


See that small bite mark? I couldn't even wait to take the picture before I had a piece.

I should work on my self control. Sigh. Happy Monday!

Monday, September 30, 2013

Random Food Photos

Normally, I post recipes. Recently, I was going through my various photographs in my "FOOD" folder on my computer, and I realized there is A LOT that I photograph with the intention of posting it here, but don't for one reason or another. I thought I would share!


Let's start here. THIS was the last gluten cupcake I baked. I baked these for the Legal Writing class I TA'd last semester for the purpose of using up regular flour. They were SO rich and sinful - homemade cake and icing.

Eating 1/2 of the cupcake in the photo is what made me realize Justin was no longer the only gluten intolerant person in the house. Sad day. If I find this recipe, I'll be sure to share it.


Sometimes, I have intense cravings. The craving above was a quesadilla craving. Quesadillas are SUPER easy. I always hesitate to post them because I don't want to post something "too easy," but I promise to make these again and post them.


THIS makes my mouth water. Justin and I bought a hibachi thing to put on our grill so we could recreate the hibachi meals you get at one of those restaurants where they cook in front of you. I even made my own "white sauce." This was so good, but insanely time consuming.


Roasted potatoes. We make these at least once every two weeks. Cut up 7-8 red potatoes, sprinkle 1-2 tbsp oil, a few pads of butter, even sprinkling of salt, pepper, garlic powder, and dry rosemary. Bake at 350 degrees for 30 minutes, then 425 for an additional 10 minutes to make crispy. YUM!


Finally, these short rib tacos. They were good, but they weren't great enough to post. It tasted like pot roast in a corn tortilla. I was not a fan. Justin is convinced we can make these better, but I haven't cared enough to try.

That's it! Thanks for letting me share all my pics. Have a great Monday!

Saturday, September 21, 2013

Homemade Meat Sauce

You know how I said I said I wanted to try zucchini noodles with a red sauce? Well, I tried it. It was amazing.


There's something about a homemade meat sauce that just screams "comfort food!!!" to me. I was dying for some comfort food the other night, but I'm really really trying to be good about dieting.

Dieting sucks.

Anyway, I didn't want to use pasta, so I decided to see how this meat sauce paired with zucchini noodles.

It. was. amazing. Even Justin said he didn't miss the pasta (WHAT?!). Either way, you can make this with zucchini noodles or pasta, but make it because it is SO good.

It takes about an hour to make, but I put it in the fridge and re-heated the next day. It was 10 times better - I highly recommend doing that.

Here's what you need (slightly adapted from Rachel Ray) . . .

Olive oil
1/2 tsp red pepper flakes*
1 lb of 90% lean ground sirloin
1 medium yellow onion, chopped
3-7 cloves of garlic, minced
3 tbsp of fresh herbs, chopped**
1/2 tsp all spice
1/4 tsp salt
1/4 tsp pepper
1/2 cup red wine
3/4 cup low sodium beef broth
28 oz can crushed tomatoes (I used San Marzano)
Pasta or zucchini noodles (see cooking instructions on bottom for zucchini noodles)

*Leave out the red pepper flakes if you don't like spicy - it gives the sauce a little kick.

**I used fresh basil, parsley, and oregano - it ended up being about 3 tbsp

Here's what you do . . .

1. In a large pan, do one circle of olive oil and let your red pepper flakes heat up in the oil for about one minute. It infuses the oil with some spice!

2. Add meat, onion, garlic, all spice, salt, pepper, and fresh herbs. Saute until the meat is brown and cooked through (about 6-7 minutes).


3. Add red wine and allow to reduce for about 4-5 minutes.

4. Add beef broth and tomatoes and simmer on low heat for one hour. Serve over your pasta of choice (or zucchini noodles) with some parmesan cheese on top. Enjoy!


For the zucchini noodles:

Julienne 3 large zucchini (julienne peeler). In a large pan with about 1 tbsp olive oil, saute your zucchini noodles with salt, pepper, and garlic powder until soft, but still crispy (about 5 minutes - test the frequently).

This was a fantastic dinner and one I didn't have to feel guilty about, which is always a plus. Zucchini noodles are my new favorite!

Have a wonderful weekend :)


Wednesday, September 11, 2013

Zucchini Noodles with Grilled Chicken and Lemon Sauce

This is one of the many recipes I have made that tastes fantastic, but looks terrifying. This picture is the best one I have. You'll see.


Zucchini noodles! This is a fabulous low carb (gluten free) alternative to pasta. I think next time I do this, I'll pour a homemade red sauce over them. Justin's reaction when I told him he was eating zucchini noodles for dinner was pretty priceless. He was looking up take out menus while I was cooking. 

Zucchini noodles are easy to make - you just need a julienne peeler to peel your zucchini. Then, they will look like that mess in the bowl above. They are really good - I promise (Justin ate them and went back for seconds).

Here's what you need (slightly adapted from The Novice Chef Blog) . . .

3 large zucchini, peeled with a julienne peeler*
1 piece of chicken, seasoned evenly on both sides with salt, pepper, and garlic powder.
Olive oil
2-5 cloves of garlic, minced
1 yellow onion, chopped
1 tbsp fresh lemon juice*
1/2 cup light cream cheese
1/2-1 tsp black pepper
1/2-1 tsp salt
3 tbsp parmesan cheese 
1 tbsp fat free half and half

*Peel the zucchini until you reach the seeds. 
**I like a very mild lemon flavor. If you want it stronger, add more lemon juice!


Here's what you do . . .

1. Grill you chicken and set aside.

2. In a large pan, pour a circle of olive oil and saute garlic and onion for 3-5 minutes, or until soft.

3. Add lemon, cream cheese, salt, pepper, and cheese. Stir to incorporate, and add half and half. You don't need a lot of half and half because the zucchini produce a lot of water. Let simmer for 3-5 minutes on medium heat.


 4. Add zucchini noodles and stir well. They only take about 3-4 minutes to cook. You don't want to cook them too long or they will get mushy. Check them frequently and pull them out while you still have a good crunch. You'll see the difference as they start to cook down.


5. Turn off the heat, stir in the grilled chicken, and enjoy!


The lemon sauce was good, but I definitely want to give this a shot with a homemade red sauce. I promise you this is not nearly as strange as it seems. 

Have a wonderful rest of your week! 


Sunday, September 8, 2013

Jerk Chicken and Pineapple Grilled Pizza

This is going to be a long post. I have A LOT to say about this pizza.


For those who don't know, Mellow Mushroom is a pizza chain in (I think) the Southeast. There was a Mellow Mushroom where we lived in Florida, and we were super excited to find a Mellow Mushroom when we moved to NC. 

Mellow Mushroom used to have this pizza - I can't remember what it was called - that was jerk chicken, pineapple, and pesto. It was my favorite; I ordered it every time. I was SO sad to find when we moved to NC that Mellow Mushroom no longer offers this pizza. You could probably "create your own," but I reject this notion. I KNOW it won't taste the same as it did when they had it on their menu. 

I'm so strange.

Anyway, I was randomly thinking about it the other day (as I tend to do about food), and I decided to recreate it. On the grill.


Grilling your pizza creates that wood-fire oven taste. It is so fantastic. I used one of these. If you are interested in grilling pizza, I highly recommend investing in one. This would also taste fantastic on a pizza stone in the oven. 380 degrees for 18 minutes. 

Here's what you need (adapted from what I remember of the Mellow Mushroom pizza) . . .

1 piece of boneless skinless chicken
Jerk seasoning (we used McCormick's)
Garlic powder
1 can of pineapple chunks, drained
1 ball of fresh mozzarella, sliced into thin pieces
Pizza sauce (we used Trader Joe's brand)
Pesto (make your own or buy at the store)
1 bag of mozzarella
Parmesan
Gluten free dough (recipe on the bottom)

Here's what you do...

1. Fire up your grill. Season your chicken evenly on both sides with jerk seasoning and garlic powder, and grill. When done, cut into small, bite-size pieces.

2. While chicken is grilling, build your pizza. Roll out your dough on the pizza grilling pan. Add pizza sauce swirled with pesto. 


3. Then, add chunks of pineapple and pieces of chicken. Lay your mozzarella pieces over your chicken and pineapple. Make sure to leave some room between the cheese and the outside of the pizza - it melts out. Fill in the gaps with the shredded mozzarella, and top with parmesan. 


4. Put on the grill for 18 minutes, or until crust starts to come off the pan and it starts to brown on top. Let it sit for 10 minutes before cutting into it.

5. Enjoy!

I couldn't get over how much this tasted like the original. AND on gluten free dough and everything.

To make GF dough (or any dough) - makes 3 dough balls:

6 cups of GF flour
2 packets of yeast
3 tbsp olive oil
3 tbsp honey
2 1/4 cup warm water
2 tsp garlic powder
2 tsp italian seasoning
2 tsp salt

Here's what you do . . .

1. In a bowl, mix water, yeast, olive oil and honey. Stir well and let sit for 10 minutes, or until it is foamy.

2. Add flour and seasoning. Stir until well blended. You will likely need to use your hands to knead the dough. 

3. Coat the bowl with olive oil, place the dough back in the bowl, and cover with a towel. Let it sit in a warm place for 1.5 hours. 

4. Cut into 3 dough balls. You can freeze what you don't need!

It's really not that difficult to make fantastic pizza at home. SO DO IT!


Confession: I was eating a leftover piece while writing this. We made this pizza twice in one week. I am failing at dieting, but this pizza made cheating well worth it. 

Sunday, September 1, 2013

Berry Crisp

Fresh Farmer's Market berries? Don't mind if I do.


To me, fresh berries scream "summer!" I can never resist them when I see them at the farmer's market, even if I have absolutely no idea what I am going to do with them. It usually winds up being dessert as evidenced by last summer's blackberry cobbler.


So much for dieting. I should work on that as we are going to Jamaica (!!!!!!) in December. But it's a holiday weekend, so fruity dessert and gin and tonics it is!

Here's what you need (adapted from How Sweet Eats)...

1 pint fresh blueberries
1 pint of fresh blackberries
2 tbsp sugar
1 1/2 tbsp flour*
1/4 tsp salt

1 cup of oats*
1/2 cup brown sugar
1/4 cup flour
1/4 tsp cinnamon
1/4 tsp salt
6 tbsp butter, softened
vanilla ice cream (necessary)

*I used Williams Sonoma Cup 4 Cup gluten free flour and certified gluten free oats from Trader Joe's - this is a GF crisp, but you can easily substitute regular flour/oats. Are you sick of me telling you these things yet?!

Here's what you do...

1. Preheat oven to 375.

2. Put your rinsed berries in a baking dish. Cover with 2 tbsp of sugar, 1 1/2 tbsp flour, and 1/4 tsp salt. Mix to combine.

3. In a separate bowl, combine your oats, brown sugar, flour, cinnamon, and salt. Using your hands, add the butter combining until everything is covered. Sprinkle the mixture evenly over the berries.

4. Bake for 25-30 minutes, or until brown on top.


5. Enjoy!

This is the perfect summer dessert, and honestly, not the worst thing for you (this is what I'm telling myself). Can someone explain to me why getting married causes you to completely abandon all sense of health and wellness? Or is it just me?

I'm working on it. On a separate note, this is what I came back to after I left my berry crisp on the table to go find my camera:


Sigh. It photographed better on a plate anyway.

Have a fabulous Labor Day!

Monday, August 26, 2013

Bay Scallops with Pasta

I'M BACK!


I am SO sorry for the three month hiatus, BUT in my defense, I got married, worked a fantastic job 90 minutes from my house...and just didn't have a ton of time. We lived off of grilled chicken and steamed vegetables. NO fun.

This recipe is SO fantastic. Bay scallops are the little tiny scallops you see at the seafood counter, and I love them. They taste sweeter to me and they are a bit easier to cook. This is an easy meal that ends up looking super fancy (I made it for our three month wedding anniversary...awww!).

Here's what you need (adapted from SkinnyTaste)...

1/2 pound of bay scallops*
1 tbsp butter
Olive Oil
3-6 cloves of garlic, minced
One shallot, minced
Several tablespoons of fresh herbs (I used oregano, parsley, thyme, and basil)
1 14 oz. can of petite diced tomatoes, drained
3/4 cup of dry white wine
Salt and pepper
1/2 small lemon
Spaghetti pasta (we used gluten free from Trader Joe's)

Here's what you do...

1. Add butter and olive oil (one turn of the pan) to a large pan. Let it get VERY hot.

2. Dry your scallops with a paper towel. They need to be super dry or your sauce will be too mushy. Add the scallops to the hot pan and let cook for 30 seconds to 1 minute. Then, flip them and let them cook 30 seconds to 1 minute on the other side. You want them browned on each side. Remove them from the pan and set aside.


3. Cook your pasta according to the box. Drain and set aside.

4. Add garlic and shallots to the pan (turn the heat to medium). If you need to add extra oil, do so. Allow to cook for 2-4 minutes. Then, add tomatoes, herbs, salt and pepper (to taste), wine, and the juice of your lemon. Stir well, and allow to simmer (low heat) for about 15 minutes.


5. Add your scallops to the sauce. Serve the scallops/sauce over the pasta sprinkled with parmesan. Enjoy!

This was a really fantastic dinner. Really simple and full of flavor.


I've missed you! I promise to be back more frequently. Happy Monday!

Tuesday, May 14, 2013

Gluten Free Banana Bread

I can't leave this bread alone.


Finals ended last Friday, and as my tradition goes, I had to bake soon after. I have no idea why (1) every semester I get this crazy urge to bake during finals and (2) why I always seem to gravitate toward baking some sort of bread. I can't stop picking at this bread - it turned out AMAZINGLY well.

My absolute FAVORITE gluten free flour to bake with is cup 4 cup from Williams Sonoma. It is seriously the best - everything I've used it in tastes completely normal. I used it in this blueberry bread with excellent results and I've used it multiple times to make my favorite pizza dough. Cup 4 Cup advertises that you use it "cup for cup" in place of regular flour, but I've found that it usually tends to be a little less (not the case with this particular recipe).

Picture courtesy of Williams Sonoma
One warning about Cup 4 Cup: it's expensive. It's about $20 per bag from Williams Sonoma. Since Justin's gluten intolerance isn't going anywhere, we invested in a 25 pound bag (it was cheaper to purchase in bulk), but we use flour A LOT. If you're not a big baker, buy 1 bag to keep around for special occasions.

Anyway, this bread is amazing and gluten free thanks to Cup 4 Cup. I used coconut oil (anyone who has read about a "Paleo" diet knows about coconut oil), and it made the bread fluffy and moist (hate that word, but there is really no other way to describe it) - SO good. If you're not a coconut fan, leave out the flakes in the streusel and the coconut extract in the actual bread. Just know the coconut oil itself doesn't give it a coconut taste.

Here's what you need (adapted slightly from How Sweet Eats)...

4 VERY ripe bananas, mashed up
1 2/3 cup of flour (I used GF, but you can use regular - same amount!)
1 cup of brown sugar
1 tsp baking soda
1/2 tsp salt
1/4 tsp cinnamon
2 eggs
1/2 cup of coconut oil, melted
1/3 cup canned coconut milk (I used light)
1 tsp vanilla extract
1 tsp coconut extract

Streusel:

2/3 cup of brown sugar
1/3 cup flour
1/4 cup unsweetened coconut flakes
1/4 tsp cinnamon
4 tbsp unsalted butter, melted

For the streusel, combine all the dry ingredients, then add the butter. Stir until everything is well incorporated. Set aside.

Here's what you do...

1. Preheat oven to 325 degrees.

2. I know they always tell you put the dry ingredients in a bowl, then slowly add various wet, blah blah. Um...I just put everything in a bowl, then slowly added flour until I got my desired consistency. You do what you want! Just make sure it's all mixed up well.


3. Pour your mixture, however you got it, into a 9x5 loaf pan. Sprinkle the streusel evenly over the loaf. Then, place the loaf pan on a baking sheet and bake for 75 minutes, or until a toothpick comes out clean.


4. Take the bread out of the oven, let cool and enjoy!


I am free for an entire week, so I plan to inundate you with recipes. Then, I will likely disappear for 2 weeks because I'm GETTING MARRIED NEXT WEEK (and starting my summer job, also fantastic)!!!!!!!!!!!

You know what I learned today? How streusel is spelled. Do you know why that's awesome? Because it has NOTHING to do with law school!

Monday, April 29, 2013

Chicken Parmesan Spaghetti Squash Boats

Sorry for the hiatus! Law school gets in the way of my hobbies sometimes. How annoying.


Today was my last day of class (YAY!), and in less than two weeks I will be done with finals (double YAY!), AND in less than 4 weeks, I will be married (TRIPLE YAY!). Oh, and I start a new job somewhere in between. SO, I apologize for being a less than consistent blogger. 

I have been wanting to try spaghetti squash FOREVER, and it figures that I finally decided to get it while it was out of season (read: it was a little expensive). These things are cheaper in the winter, BUT I so recommend these - they were so good! And, of course, gluten free (is anyone sick of me reminding you?).

Here's what you need (adapted from Skinnytaste)...

2 medium spaghetti squash
1 jar of your favorite marinara (I used a Trader Joe's brand)
Salt/pepper
1-3 garlic cloves, minced
1 medium yellow onion, chopped
Chicken*
Italian seasoning
Reduced fat italian cheese (I used a blend, but feel free to just do mozzarella)
Parmesan cheese

*I had leftover rotisserie chicken, but you could also use grilled chicken (seasoned with some oregano, garlic powder, salt and pepper).

Here's what you do...

1. Preheat oven to 350.

2. Split your spaghetti squash in half (easier said than done) and scoop out the seeds on the inside. Place the squash cut side up on a baking sheet. Season with salt and pepper, then roast for 60 minutes.


3. In the meantime, saute your onion and garlic in some olive oil until soft (5-7 minutes). Once it's done, mix in your chicken and set aside.

4. When the squash are done roasting, use a fork to "fluff" the spaghetti out of it. It will come off all the sides - it's really cool (at least to me).


5. Pour in a layer of marinara (I mixed it into the "spaghetti"), then your chicken/onion mixture, then another layer of sauce. Top with a good layer of italian cheese, some italian seasoning, and parmesan.


6. Bake for 15 minutes or until cheese is melted and it's warmed through. Enjoy!


These were even good leftover - and actually really simple.

I will do my absolute best to be around more, but I can't make any promises. I do have some amazing homemade cupcakes, a gluten free version of this blueberry bread, and yet another pasta recipe on the horizon. Don't give up on me!